The one content QA checklist you need before hitting publish

If content passes spelling and grammar, matches the meta title’s intent, has working links and correct alt text, meets basic contrast standards, and a human has signed off on tone and accuracy, it’s ready to publish. That’s the gate. Run a scan through something like Website SpellChecker, cross-check indexation basics in Google Search Console, and confirm accessibility against WCAG guidelines. Automation catches the mechanical errors. It still needs a person to say yes.
Key Takeaways
Reliable content quality comes from pairing a short, scannable pre-publish gate with staged human review, and treating automation as the layer that handles repetition, not judgement.
| Point | Details |
|---|---|
| Run the one-line gate | Spelling, meta accuracy, links, alt text, and accessibility checks pass before any human sign-off happens. |
| Sequence checks deliberately | Fact-check first, then readability and tone, then SEO and technical checks, to avoid wasted polish work. |
| Automate the repeatable layer | Spelling, grammar, broken links, and missing alt text are ideal automation targets; tone and nuance stay human. |
| Watch the first 72 hours closely | Monitor Search Console and analytics immediately after publish, then weekly, then monthly. |
| Use Website SpellChecker for the spelling layer | Its site-wide scans, scan history, and PDF reports give editors a concrete record to attach to sign-off. |
Table of Contents
- Your content qa checklist: the quick version you can run in a minute
- How to run the pre-publish checklist step by step
- Which checks should you automate, and which need a human?
- Who owns each step, and how long should it take?
- What to watch after content goes live
- Formatting and consistency checks that keep your site coherent
- How do you test mobile responsiveness before publishing?
- Does content length actually affect page load speed?
- What does multilingual and localization QA involve?
- How do you validate readability and engagement before publishing?
- When should you update or retire old content?
- How do you QA user-generated content at scale?
- Author perspective: what the checklist can’t automate
- How Website SpellChecker fits into your content qa workflow
- Sources
Your content qa checklist: the quick version you can run in a minute
Before anything goes live, run it past this list. It won’t catch everything, but it catches the mistakes that do the most reputational damage, and it takes less time than writing the meta description did.
- Spelling and grammar: run an automated scan across the full page, not just a quick read through.
- Factual accuracy: verify every statistic, date, and claim against its original source.
- Headline and meta title: confirm they match the reader’s actual search intent, not just the keyword.
- Meta description: check it’s under 160 characters and gives a real reason to click.
- Headings and structure: make sure H1, H2 and H3 tags follow a logical hierarchy, no skipped levels.
- Image alt text: describe what the image does or shows, not just “image1.jpg”.
- Links and redirects: click every internal and external link, and check none loop into a redirect chain.
- Accessibility basics: check colour contrast, keyboard navigation, and heading order against WCAG.
- Legal and disclosure checks: confirm copyright on images, affiliate disclosures, and privacy policy links.
- Performance cursory check: glance at page weight and load time before publishing, not after.
Pro Tip: Automated scans are excellent at catching typos, doubled words, and broken links, but they can’t tell you that a sentence is technically correct and still misleading. Budget five minutes of human review for context and nuance, even on content that’s already passed every automated check.
Some of this is automatable and some genuinely isn’t. Spelling, grammar, broken links, and missing alt text are jobs for a scanning tool. Tone, factual nuance, and anything touching legal or financial claims need a person who understands the subject, not just the sentence structure. A content review process that treats every check as equally automatable is the fastest way to publish something technically clean and substantively wrong.
How to run the pre-publish checklist step by step
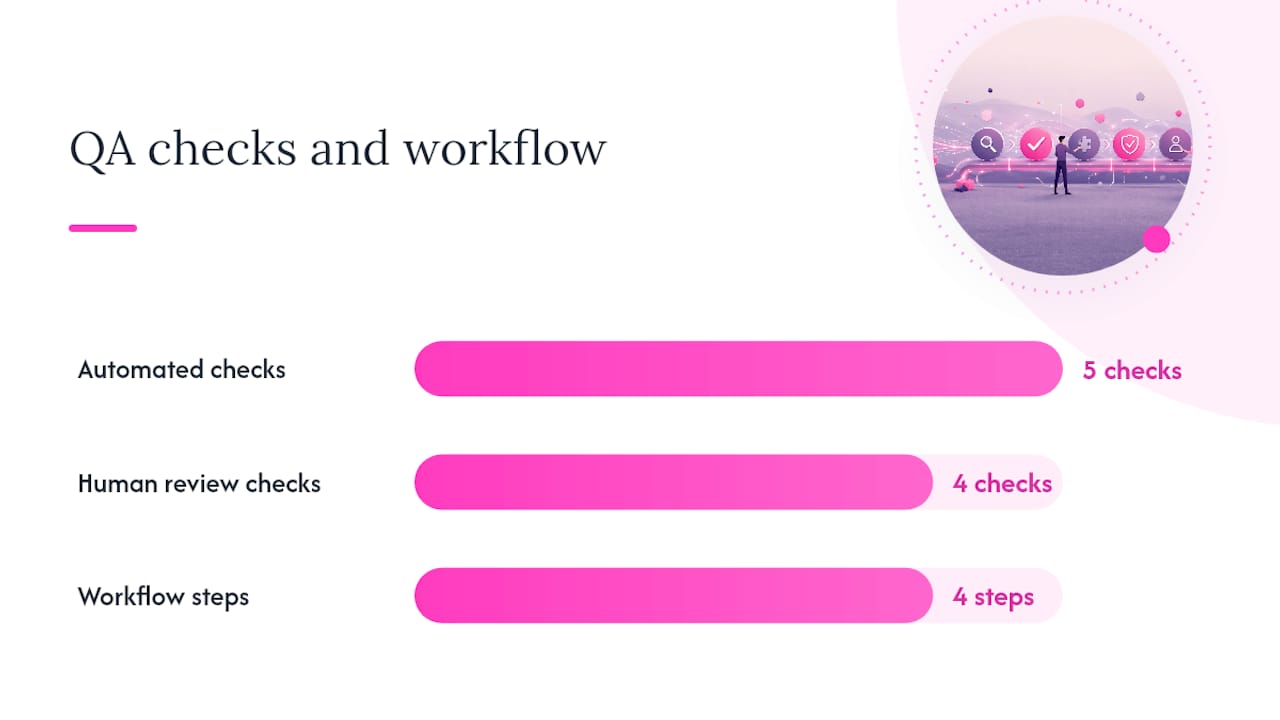
Running checks in the wrong order wastes time. Fixing typos in a paragraph that gets deleted during fact-checking is effort you didn’t need to spend. Content quality checks work best when grouped into five core areas: accuracy, readability, SEO, originality, and measurement readiness, run roughly in that sequence.
- Fact-check first. Verify every statistic’s source and publication date before you touch phrasing. If a claim can’t be traced to a primary source, cut it or flag it for escalation.
- Check clarity and readability. Read the piece aloud, or run it through a readability checker. Long, tangled sentences get flagged here, before you polish grammar around them.
- Confirm tone and brand voice. Compare against your house style guide. This is where a human reviewer, not a scanner, earns their keep.
- Run SEO checks. Confirm the H1 matches title intent, meta description is within length, and headings follow structure without skipped levels.
- Test accessibility. Check alt text describes function rather than decoration, verify contrast ratios, and tab through the page to test keyboard navigation.
- Run technical checks. Test every link, confirm redirects resolve cleanly, and check image file sizes aren’t dragging load time down.
- Final sign-off. A named approver checks the whole piece against the brief one last time before it goes live.
A good review starts before the editor even opens the document: writers who check their own links, images, and alt text before submitting cut review rounds significantly. Anything touching medical, legal, or financial claims should escalate to a subject-matter expert or legal reviewer rather than get waved through by a generalist editor.
Which checks should you automate, and which need a human?
Some checks are repetitive by nature, which makes them ideal candidates for automation. Others depend on judgement a script can’t replicate.
- Automate: spelling and grammar, broken link detection, missing alt text flags, duplicate content checks, and basic SEO field validation (title length, meta presence).
- Keep human: tone consistency, factual nuance, brand voice, and anything where context changes whether a sentence is accurate.
- Track over time: scan history matters as much as the scan itself, since it shows whether the same error keeps recurring across a site.
Automation has a ceiling. A spell checker can confirm “affect” is spelt correctly. It can’t tell you the writer meant “effect.” That distinction needs a person who reads for meaning, not just for correct letters.
A workable integration pattern looks like this: run scheduled, site-wide scans on a recurring basis, attach the resulting report directly to the CMS editorial task, assign specific fixes to whoever owns that page, then re-scan before final sign-off. Website SpellChecker fits neatly into that pattern for the spelling and grammar layer specifically. Its scan history tracking means you can see whether errors are getting fixed or just resurfacing, and its downloadable PDF reports give editors something concrete to attach to a sign-off ticket rather than a vague “looks fine to me.”
Who owns each step, and how long should it take?
A checklist without owners just becomes a document nobody follows. Assign each stage to a role, even if one person wears several hats on a small team.
- Writer: drafts content and self-checks links, images, and obvious typos before submission.
- Editor: reviews clarity, structure, and brand voice; owns the “does this read well” question.
- Fact-checker: verifies claims, statistics, and sources; on small teams this is often the editor wearing a second hat.
- SEO reviewer: checks titles, metadata, headings, and internal linking.
- Accessibility reviewer: checks contrast, alt text, and navigation; can be combined with the SEO role on smaller teams.
- Final approver: signs off before publish, and is accountable if something slips through.
Realistic timelines vary by content type: a standard blog post might take a few hours across all review stages, a landing page might take significantly longer given the stakes attached to conversion copy, a marketing email typically requires a moderate amount of review time, and a full campaign page can require several days especially when legal and design reviews are involved.
Cost scales with reviewer hours, but automation changes the maths on large sites. A staged review process with structure, draft review, copy editing, fact-checking and approval as distinct steps takes longer per piece but catches more before publish, and pay-per-scan tools reduce the hourly cost of the mechanical layer considerably compared with a human reading every page for typos. Keep a simple change log and require an approval ticket before anything goes live. It stops the same error being “fixed” three times by three different people who didn’t know someone else had already touched it.
What to watch after content goes live
Publishing isn’t the finish line. Check Google Search Console for indexation status and crawl errors, watch analytics for unexpected bounce rate shifts, and run a scheduled scan for new spelling issues or links that broke after publish (yes, links break on their own over time).
Watch for these triggers specifically:
- A sharp drop in organic traffic to the page, which often signals an indexing or intent mismatch.
- Any accessibility complaint from a real user, which should jump the queue ahead of routine fixes.
- Broken payment or signup links, which cost revenue for every hour they stay live.
A sensible cadence: check closely in the first 48 to 72 hours, weekly for the first month, then monthly once the page has settled.
Formatting and consistency checks that keep your site coherent
Small inconsistencies compound across a site faster than most teams expect. One page uses “email,” another uses “e-mail.” One writer spells out dates as “March 3, 2026,” another writes “3/3/26.” None of these are wrong in isolation, but together they make a site read like it was assembled by five different people who never spoke to each other, because it usually was.
A style guide solves this, but only if someone actually checks against it. Confirm punctuation matches house rules (Oxford comma or not, curly quotes or straight), that headings follow consistent capitalisation, and that brand terms are spelt and capitalised the same way every time they appear. Check numbers: are you writing “10%” or “10 percent” consistently? Check dates: one format, applied everywhere.
Brand voice drift is subtler and harder to catch with a tool. A blog post written in a friendly, second-person voice sitting next to a stiff, third-person product page reads as two different companies. Editors reviewing for consistency should read a sample of five or six pages back to back, not just the one they’re editing, to catch voice drift that’s invisible page by page but obvious in sequence.
How do you test mobile responsiveness before publishing?
Most traffic to most sites now arrives on a phone, which means a page that looks polished on a widescreen monitor and useless is worth nothing.

Test on an actual device, not just a browser’s responsive preview mode, because rendering quirks in real mobile browsers don’t always match desktop simulations. Check that body text doesn’t require pinch-zooming, that buttons are large enough to tap accurately, and that images scale rather than overflow the viewport and force horizontal scrolling.
Pay particular attention to tables. A comparison table that reads cleanly on desktop often collapses into an unreadable mess on a phone screen unless it’s been built to reflow. Forms deserve the same scrutiny: a signup field that’s easy to tap on a laptop trackpad can be maddening on a small touchscreen if the tap target is too tight.
Test across at least two screen sizes and two browsers before calling a page done. An iPhone and an Android device running Chrome will occasionally render the same CSS differently, and the gap tends to show up in navigation menus and embedded video first. Build cross-device testing into the pre-publish checklist rather than treating it as a nice-to-have QA extra, because a broken mobile layout on a landing page directly costs conversions.
Does content length actually affect page load speed?
It does, though not in the way most writers assume. Text itself is lightweight. The problem is almost always what surrounds the text: uncompressed images, embedded videos, unnecessary scripts, and web fonts loading multiple weights nobody uses.
A 2,000 word article with three unoptimised, full-resolution images can load slower than a 4,000 word article with compressed, correctly sized assets. Before publishing, check every image has been compressed and sized appropriately for its container, rather than uploaded at whatever resolution the original camera or design tool produced.
Run a quick check on total page weight and loading behaviour before the content goes live, not after a complaint arrives by using a comprehensive website QA checklist. Lazy-loading images below the fold and deferring non-critical scripts both help without touching the actual writing. A technical site audit that includes page weight and load time alongside content checks catches this before it becomes a ranking problem, since load speed feeds directly into how search engines assess page experience.
What does multilingual and localization QA involve?
Translating content is the easy part. Localizing it properly means checking that dates, currency, measurement units, and idioms all make sense to the reader they’re actually written for, and that’s where most QA processes break down.
Automated translation tools miss idiom and context reliably, which is exactly why a spelling and grammar scan built for multiple languages matters more than a generic translation checker. Website SpellChecker’s multilingual scanning support means the same site-wide check that catches an English typo can catch the equivalent error in a French or German version of the same page, without needing a separate tool per language.
Beyond language mechanics, check that currency symbols match the target market (not just translated numbers with the wrong symbol left in place), that date formats follow local convention, and that cultural references or idioms translate sensibly rather than literally. A phrase that lands as friendly in American English can read as oddly informal, or simply confusing, once translated word for word into another language. Route any localized page through a native speaker review, not just a translation tool, before it publishes.
How do you validate readability and engagement before publishing?
A piece can pass every grammar check and still fail readers if it’s dense, jargon heavy, or structured in a way that makes scanning difficult. Readability tools scoring against a grade level give a useful proxy, but the real test is whether a reader unfamiliar with the topic can follow the argument without rereading sentences.
Check paragraph length: several consecutive long paragraphs signal a piece that needs breaking up with subheadings or bullet points. Check sentence variety: a page of uniform, short sentences reads as robotic just as reliably as one long unbroken paragraph reads as exhausting.
Once published, engagement metrics tell you whether the readability check actually worked. Time on page, scroll depth, and bounce rate all signal whether readers are engaging with the content or leaving within seconds. A content quality framework that includes post-publish measurement alongside pre-publish accuracy and readability checks treats quality as something you verify twice, once before publishing and once after real readers interact with it.
When should you update or retire old content?
Content that was accurate and well-ranked a year ago can quietly become a liability. Prices change, statistics age, product features get discontinued, and search intent for a given query shifts as competitors publish better answers.
Build a maintenance calendar rather than waiting for someone to notice a problem. Flag any page referencing a specific year, price, or statistic for review at least annually, and flag anything tied to a product or policy for review whenever that product or policy changes. A quarterly audit of your highest-traffic pages, checking for outdated claims and stale statistics, catches most decay before it costs meaningful traffic.
Decide in advance what triggers a full rewrite versus a light patch. A broken statistic or an outdated screenshot usually needs a patch. A page whose entire premise has become inaccurate, or whose competitors have clearly published a more thorough answer, needs a rewrite. Track update dates visibly where your CMS allows it, both for your own planning and because a visible “last updated” date signals currency to readers.
How do you QA user-generated content at scale?
Reviews, comments, forum posts, and submitted testimonials carry different risk than content your own team writes, because you don’t control the input, only the moderation.
Spelling and grammar errors in user-generated content are usually low stakes and arguably part of the authenticity, so don’t hold submitted reviews to the same polish standard as a blog post. The real QA priorities are different: check for spam, check for content that could expose the business to legal risk (defamatory claims, false statements about competitors), and check for anything that violates basic accessibility, like an image upload with no alt text at all.
Automated moderation tools catch obvious spam and profanity reliably. What they miss is the more damaging category: a user comment that’s factually wrong in a way that could mislead other readers, or a submitted testimonial that makes a claim your business can’t substantiate. A human review layer for anything published under your domain, even content someone else wrote, remains necessary precisely because your site’s credibility is on the line either way.
Author perspective: what the checklist can’t automate
I’ve come to trust automation for the mechanical layer and distrust it for anything requiring judgement about what a sentence actually means to a reader. A tool like Website SpellChecker earns its place doing large-scale spelling sweeps. It doesn’t replace an editor who understands the brand.
How Website SpellChecker fits into your content qa workflow
Website SpellChecker is built for exactly the step most teams handle worst: catching spelling and grammar errors across an entire site, not just the page someone happens to be editing that day. Run a full site-wide scan, and it flags issues instantly rather than making you click through page by page. Every scan builds a history, so you can see whether a recurring error is getting fixed or just reappearing on new pages.
In practice, this slots into the workflow two ways. First, attach the scan report directly to the relevant CMS task or editorial ticket, so the fixes are visible right where the writer or editor is already working, rather than living in a separate spreadsheet nobody checks. Second, schedule a recurring scan before any campaign launch or major site update, catching errors introduced during the rush of last-minute edits that always happens before a deadline. The downloadable PDF report gives your approver something concrete to reference during sign-off, rather than a verbal “I think it’s fine.”
If you manage content for a marketing team, the marketing professionals landing page shows exactly how scans map onto an editorial calendar. Business owners looking for a straightforward starting point can scan their site for free and see what a site-wide report actually surfaces before committing to anything.